
If you’re going to bug in when SHTF – and I think that’s what we all hope to do – you need to make your house hard to break into.
There are a lot of ways to do that, including window bars, sturdier doors, and other structural improvements.
One of my favorite security measures, and also one of the most affordable one, is to grow an edible security fence.
How Raspberries Can Save Your Life When The Grid Goes Down
Yes, raspberries.
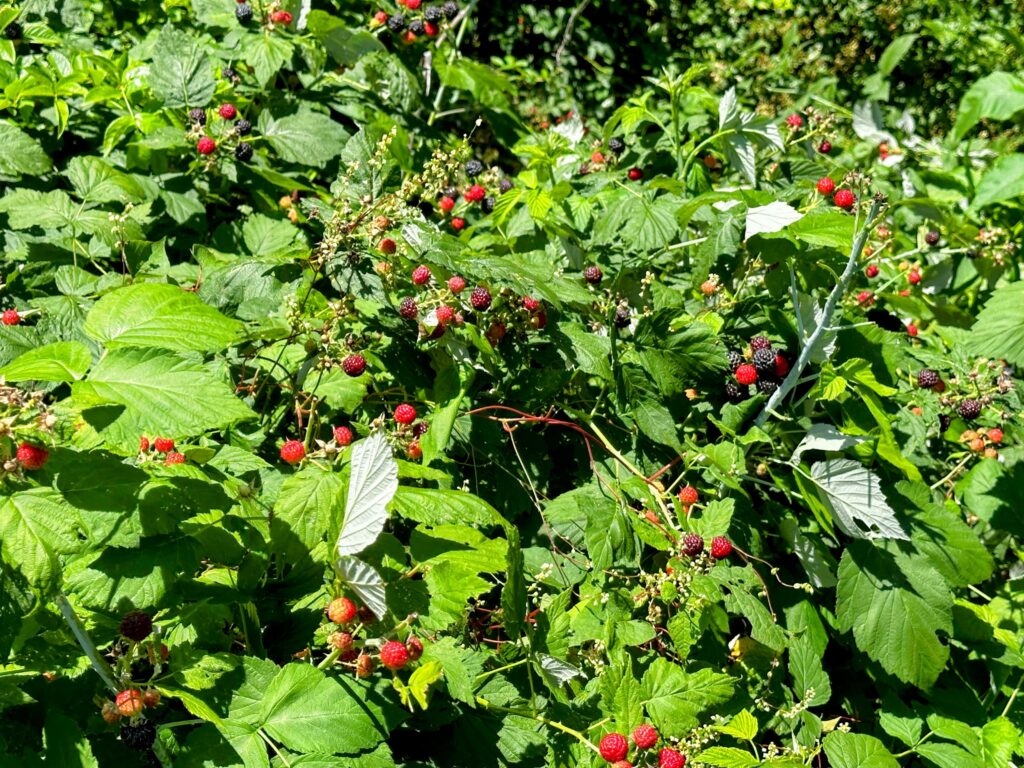
A wall of raspberry, blackberry, or loganberry bushes is a fearsome deterrent to wanna-be raiders. They’ve got vicious thorns, and the bushes get very dense. There is no way for a burglar/gang of looters to get through the bushes quickly.
Yes, they could bring hedge-clippers, but this would be a time consuming operation and assuming that you have people keeping watch, or you have dogs who will bark and alert you, or both – you’ll know about their presence long before they can get through your edible hedge.
Where To Plant Your Hedge
Ideally, you’d have an exterior fence already around your house, and you would plant your edible hedge directly along the interior of that fence. You can go out in your own yard and pick the berries when they’re in season, and you can trim back your edible security fence without having to leave your yard area.
Keep in mind, they will need to get six to eight hours of sun per day.
If you’re going whole hog, you can plant your edible hedge on the exterior of the fence too, to prevent people from ever getting to that fence in the first place.
Additionally, it’s great to plant thorny plants underneath your windows, to discourage burglars from breaking in.
One thing to keep in mind – the first year that you plant your bushes, they just look like a bunch of bare canes. They’re not going to turn into a fence right away.
The second year, they will fill out somewhat, and start producing some berries.
The third year they’ll be growing like crazy and will spread out, and give you an excellent crop.
So the time to get those canes and start planting is now! Well, ideally, in spring, which is the best time to plant them. However, I’ve planted them in fall and didn’t have any problems.
Which Berry Bushes Should I Choose For My Edible Security Fence?

All of them! Seriously.
Choose several different varieties of raspberries and blackberries and loganberries. Reason?
First of all, variety.
In a SHTF scenario, the variety of food that we will be able to eat will be vastly reduced. It will make life more bearable to create as much variety for our meals as we are able to, which is definitely something to take into account when you are planning your prepper garden.
Secondly, very importantly, different types of berry bushes will bear fruit at different times of the season. You can find early, middle and late growing varieties. Try to get some of each.
So, where can you get these berry bushes, and how can you plant them? Easy! You can order all of them online or pick them up at your local garden center when they are in season.
Make sure to check that they are the right variety for your plant hardiness zone.
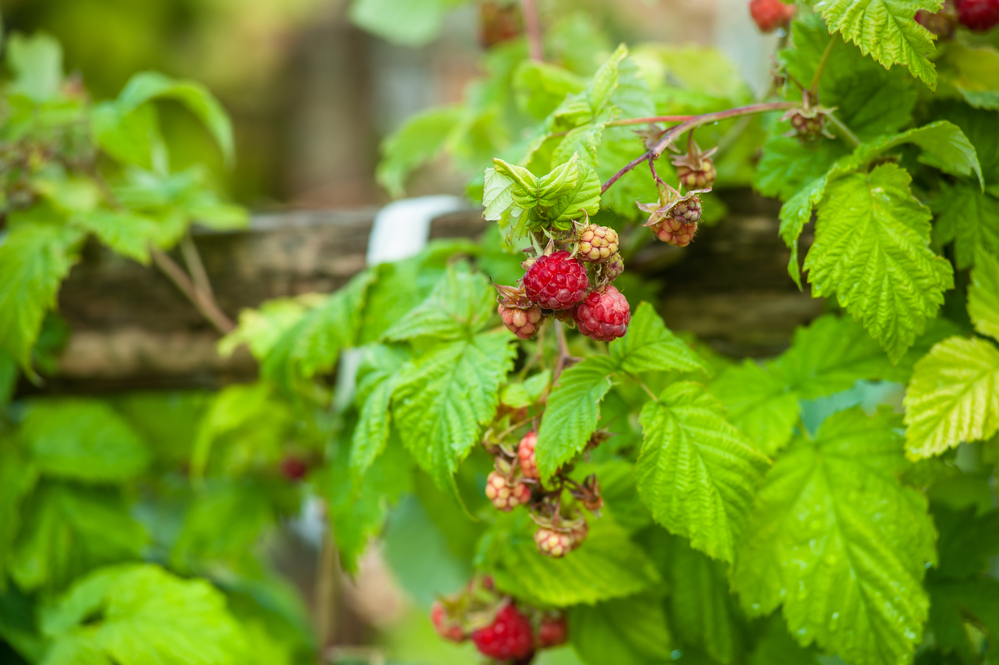
How To Plant Raspberries
1. Choose the Right Variety
Raspberries come in several varieties, including summer-bearing and everbearing (or fall-bearing) types. Summer-bearing raspberries produce one large crop in early summer, while everbearing varieties produce two smaller crops: one in early summer and another in the fall. I recommend, you guessed it, getting some of each variety.
2. Select the Ideal Location
Raspberries thrive in well-drained soil with a pH between 5.5 and 6.5. Avoid areas where potatoes, tomatoes, peppers, or eggplants have been planted recently, as they can carry diseases harmful to raspberries.
3. Prepare the Soil
Before planting, enrich the soil with organic matter like compost or well-rotted manure. This improves soil fertility and drainage. Dig a trench about 12 inches wide and 8 inches deep. Mix in compost to ensure your raspberry canes have the nutrients they need to grow strong.
4. Planting the Canes
Plant your raspberry canes in early spring when the soil is workable. Space the canes about 18 to 24 inches apart in rows that are 6 to 8 feet apart. Place the canes in the trench, spreading the roots out evenly. Cover the roots with soil, ensuring the crown (where the stem meets the roots) is just below the soil surface. Water thoroughly after planting.
5. Mulch and Water
Apply a thick layer of mulch around the base of the canes to help retain moisture and suppress weeds. Wood chips, straw, or shredded leaves work well. Water the canes regularly, especially during dry spells, to keep the soil consistently moist but not waterlogged.
6. Support the Canes
As raspberry canes grow, they need support to stay upright. Install a trellis or stakes along the row to tie the canes to as they grow. This prevents the canes from bending or breaking under the weight of the fruit.
7. Pruning and Maintenance
Prune your raspberry canes annually to encourage healthy growth and fruit production. For summer-bearing varieties, prune the canes that have fruited back to the ground after harvest. For everbearing varieties, cut back the canes that fruited in the fall to the ground in late winter or early spring.
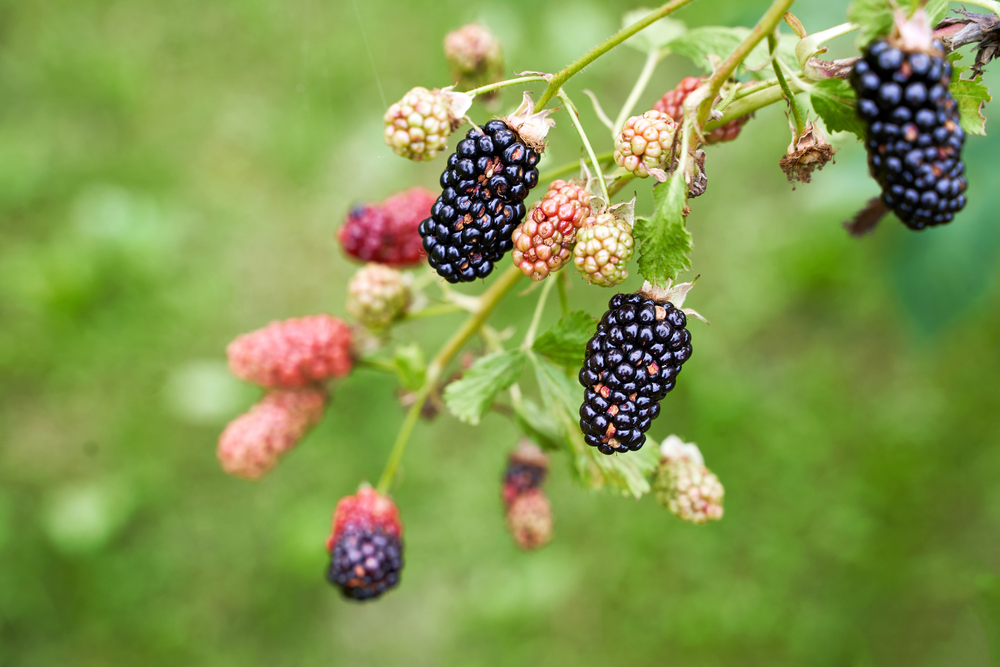
How To Plant Blackberries
1. Choose the Right Variety
Blackberries come in several varieties, including thorny, thornless, and primocane-bearing types. Don’t pick thornless if you are trying to plant a security hedge! Primocane-bearing types produce fruit on first-year canes, extending your harvest season.
2. Select the Ideal Location
Blackberries thrive in well-drained, slightly acidic soil (pH 5.5 to 7.0). Choose a sunny spot in your garden that gets at least six to eight hours of sunlight daily. Ensure the location has good air circulation to reduce the risk of disease.
3. Prepare the Soil
Before planting, enrich the soil with organic matter such as compost or well-rotted manure. This improves soil fertility and drainage. Dig a hole or trench about 12 inches wide and 12 inches deep, and mix in the compost.
4. Planting the Blackberries
Plant your blackberry canes in early spring when the soil is workable. Space the plants about 3 to 5 feet apart in rows that are 6 to 8 feet apart. Place the roots in the hole or trench, spreading them out evenly. Cover the roots with soil, making sure the crown (where the stem meets the roots) is just below the soil surface. Water thoroughly after planting.
5. Mulch and Water
Apply a thick layer of mulch around the base of the plants to help retain moisture and suppress weeds. Wood chips, straw, or shredded leaves work well. Water the plants regularly, especially during dry spells, to keep the soil consistently moist but not waterlogged.
6. Support the Canes
Blackberry canes can grow quite tall and need support to stay upright. Install a trellis or stakes along the row and tie the canes to the support as they grow. This prevents the canes from bending or breaking under the weight of the fruit. Alternatively, you can tie them to your fence as they grow.
7. Pruning and Maintenance
Prune your blackberry canes annually to encourage healthy growth and fruit production. Prune out the canes that have fruited back to the ground after harvest. For primocane-bearing types, prune the canes that fruited in the fall to the ground in late winter or early spring.
How To Grow Loganberries
1. Choose the Right Location
Loganberries thrive in well-drained, fertile soil with a pH between 5.5 and 6.5. Select a sunny spot in your garden that receives at least six to eight hours of sunlight daily. Good air circulation is also essential to prevent diseases.
2. Prepare the Soil
Enrich the soil with organic matter such as compost or well-rotted manure before planting. This will improve soil fertility and drainage. Dig a trench about 12 inches wide and 8 inches deep, mixing in the organic matter to create a nutrient-rich environment for your loganberry canes.
3. Planting the Loganberries
Plant loganberry canes in early spring when the soil is workable. Space the canes about 4 to 6 feet apart in rows that are 6 to 8 feet apart. Place the canes in the trench, spreading the roots out evenly. Cover the roots with soil, ensuring the crown (where the stem meets the roots) is just below the soil surface. Water thoroughly after planting.
4. Mulch and Water
Apply a thick layer of mulch around the base of the canes to help retain moisture and suppress weeds. Wood chips, straw, or shredded leaves work well. Water the canes regularly, especially during dry spells, to keep the soil consistently moist but not waterlogged.
5. Support the Canes
Thorny loganberry canes can grow quite long and need support to stay upright. Install a trellis or stakes along the row to tie the canes to as they grow, or tie them to a fence if you are using them to enhance the security of your fence.
6. Pruning and Maintenance
Prune your loganberry canes annually to encourage healthy growth and fruit production. After the canes have fruited, cut them back to the ground. New canes will emerge and bear fruit the following year. Regular pruning helps maintain a manageable size and shape for your loganberry plants.
7. Harvesting
Loganberries typically ripen in mid to late summer. Harvest the berries when they are fully ripe and have a deep red color. Gently pull the berries from the canes, being careful not to damage the plant.